7 Movements Your Neck Loves: A 15-Minute Daily Routine to Prevent Neck Pain
By SPOLBAN Team··Updated ·5 min read
Adapted from a routine shared by instructor Li Dan. This article is for general education and is not a substitute for individual medical advice.
Thirty Years Old, Seventy-Year-Old Neck
It is a phrase you hear more and more often, and for good reason. Most of us spend the working day seated in front of a screen, then spend the evening looking down at a phone. The phone has effectively become another organ — always within reach, always pulling the head forward and down.
The result is predictable. Stiff, aching shoulders and neck. A cervical curve that flattens out. The forward-head posture sometimes called "turtle neck." Beyond the effect on appearance, sustained compression of the nerves in the neck can produce dizziness, nausea, and numbness or tingling down the arms.
The routine below consists of seven straightforward movements that both prevent and relieve neck and shoulder problems. Practised for 10–15 minutes a day, they help keep cervical pain at a distance.
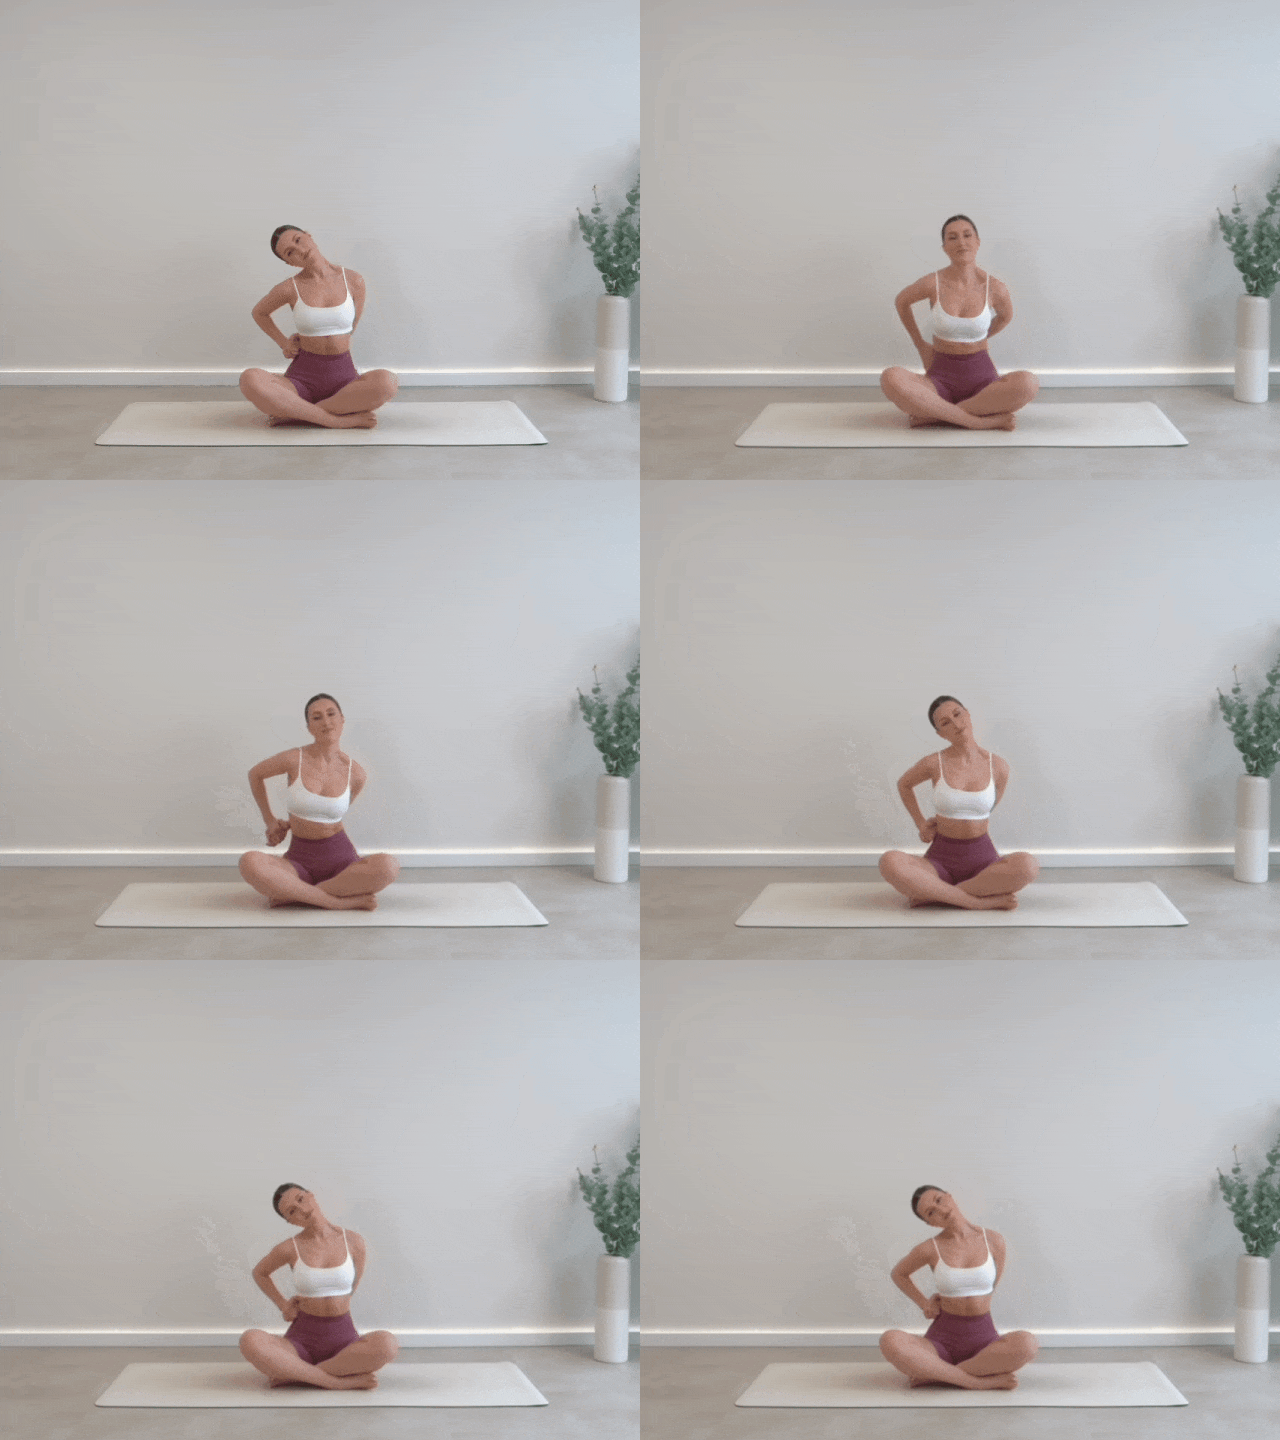
1. Seated Side Neck Stretch
- Sit cross-legged in a comfortable position.
- Inhale: lengthen through the head, neck, and spine; keep the lower back upright.
- Exhale: bend both arms behind you and interlace the fingers.
- Draw the left hand across toward the right side of your waist with the right hand.
- Side-bend the head to the right. Hold for 30 seconds to 1 minute.
- Switch sides.
Key point. Lengthen the neck and spine before you side-bend. The head bending right and the left shoulder pressing down create opposing forces — that opposition is what makes the stretch reach deeper.
2. Seated Chest Opener
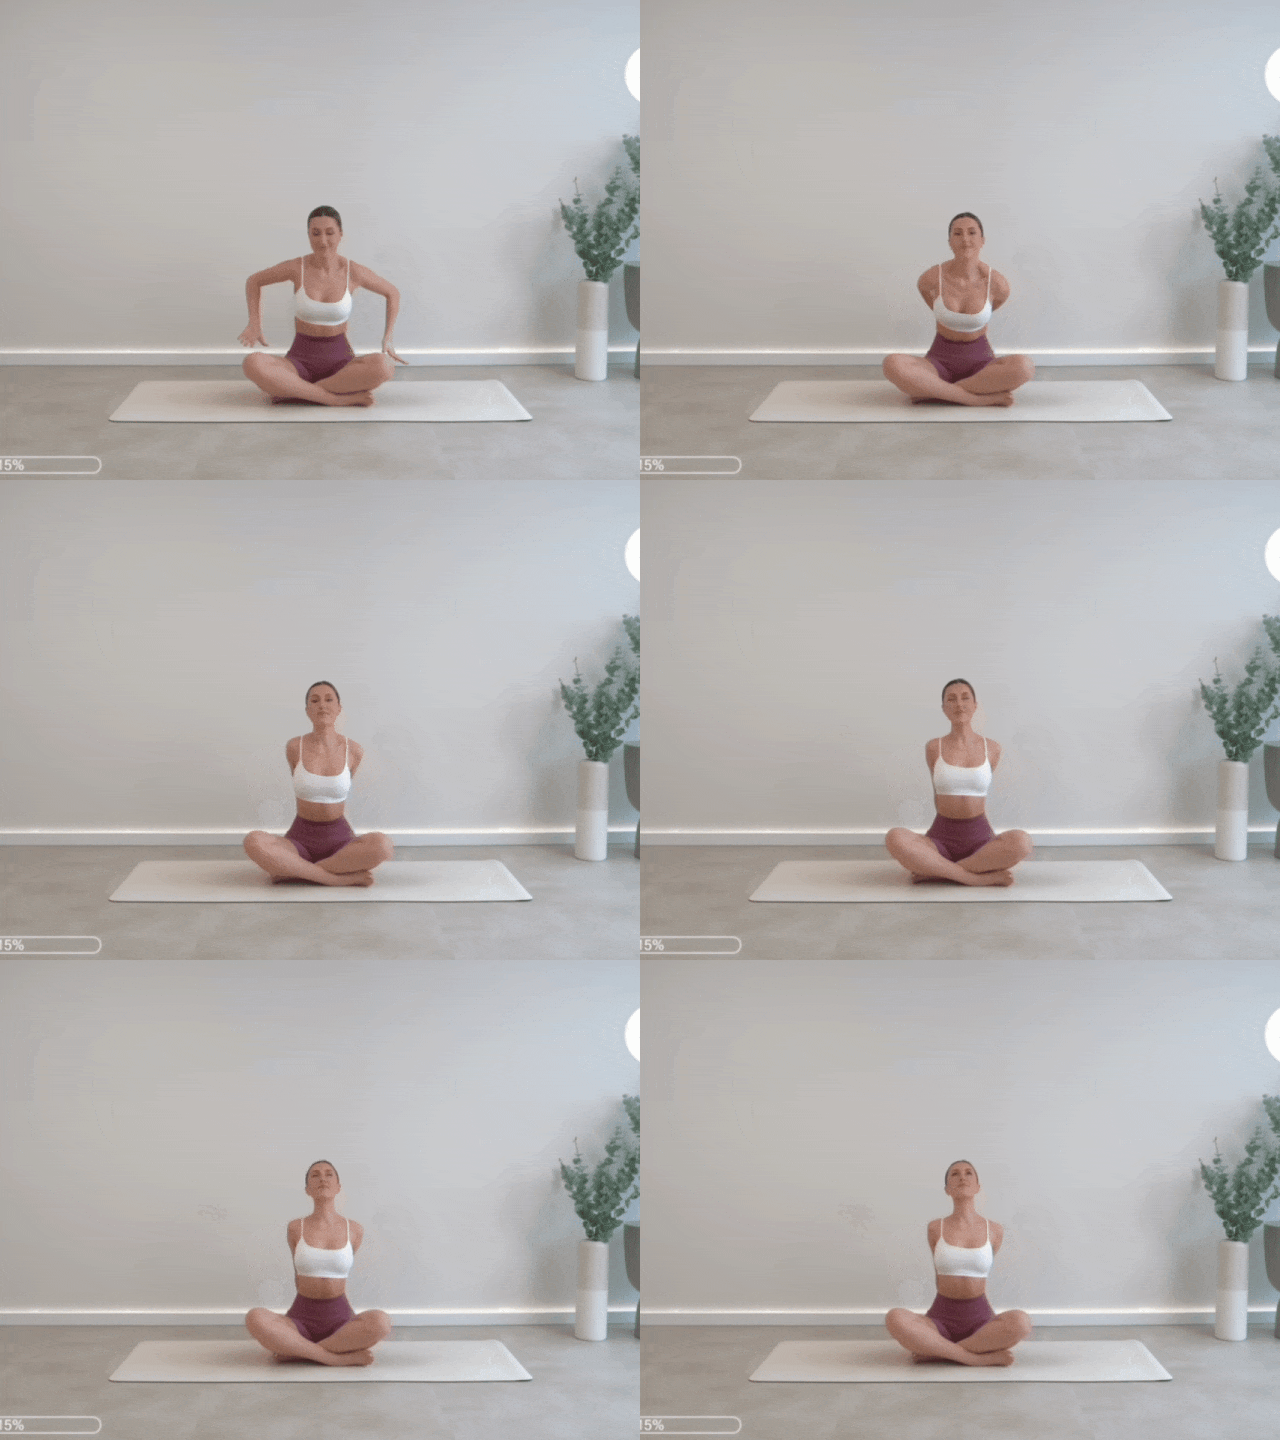
- Sit tall and interlace the fingers behind your back.
- Inhale: lengthen the head, neck, and spine; lift through the lower back.
- Exhale: draw the arms back and open the chest.
- Slowly lift the chin upward.
- Hold for 30 seconds to 1 minute.
Key point. Keep the spine long — avoid collapsing the lower back or tipping the hips. Draw the abdomen in gently, roll the shoulders open and down, and let the chin and chest work against each other to deepen the opening.
3. Controlled Chin Tuck and Lift
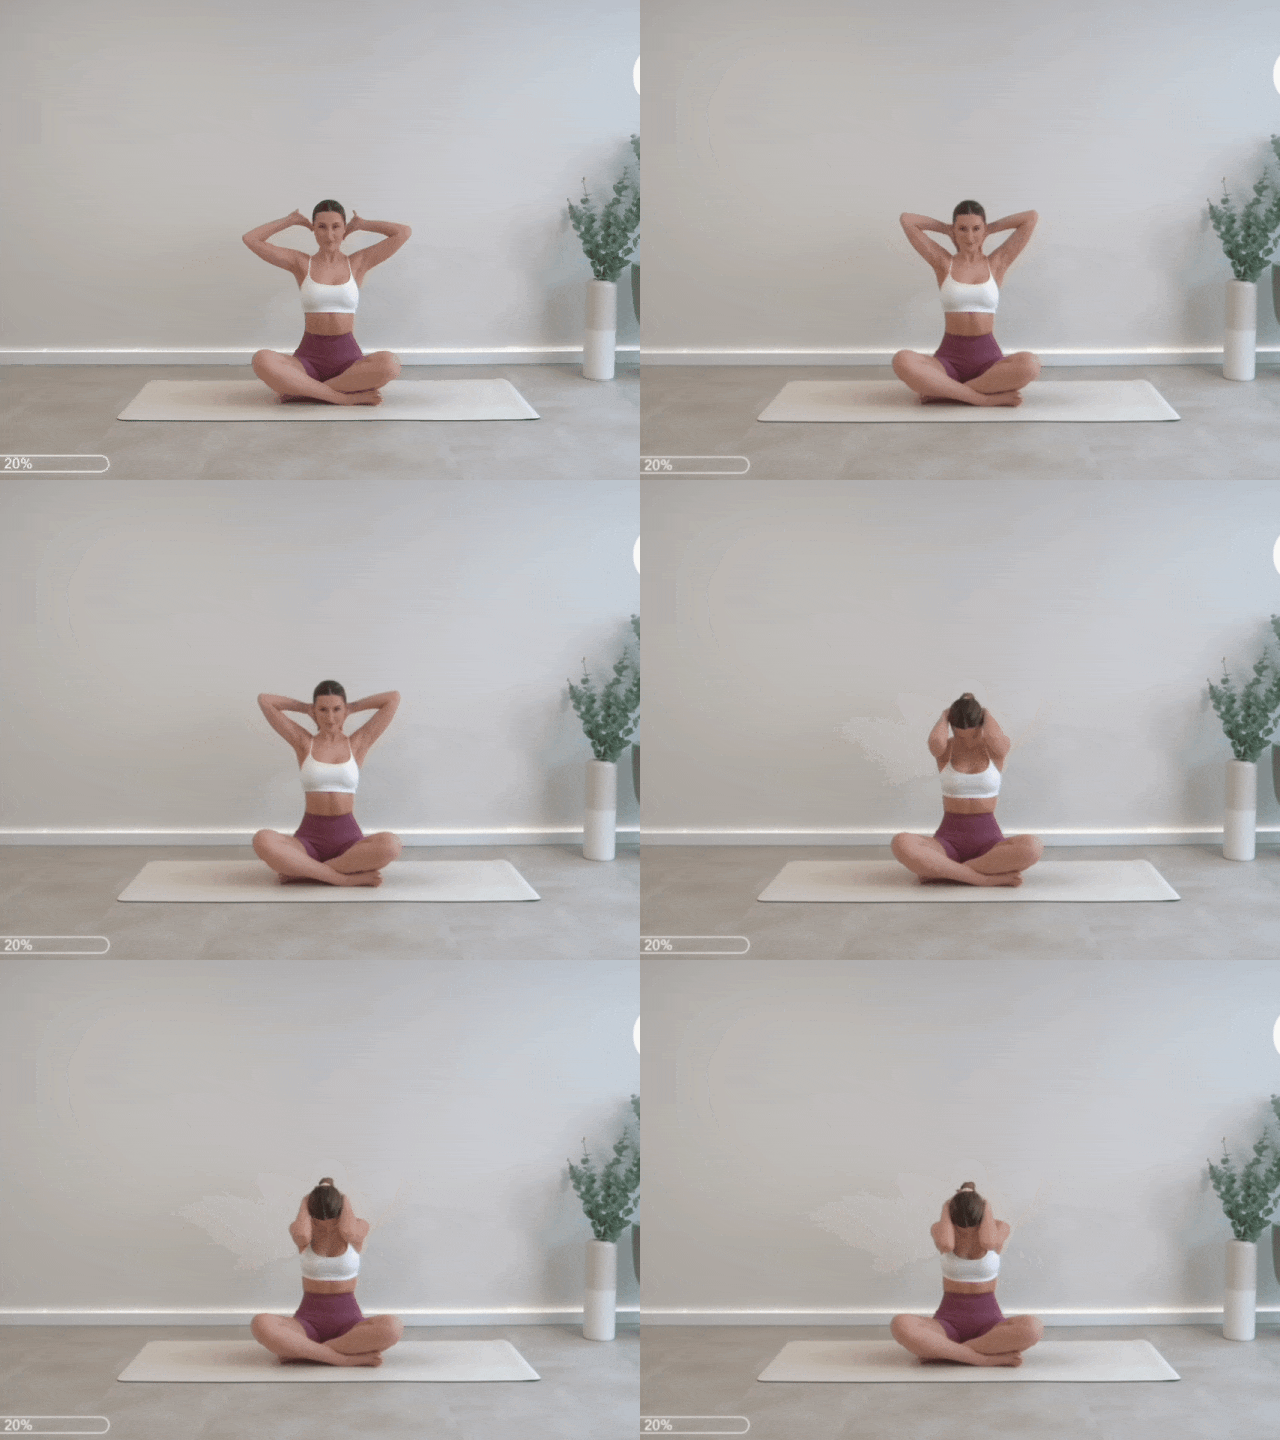
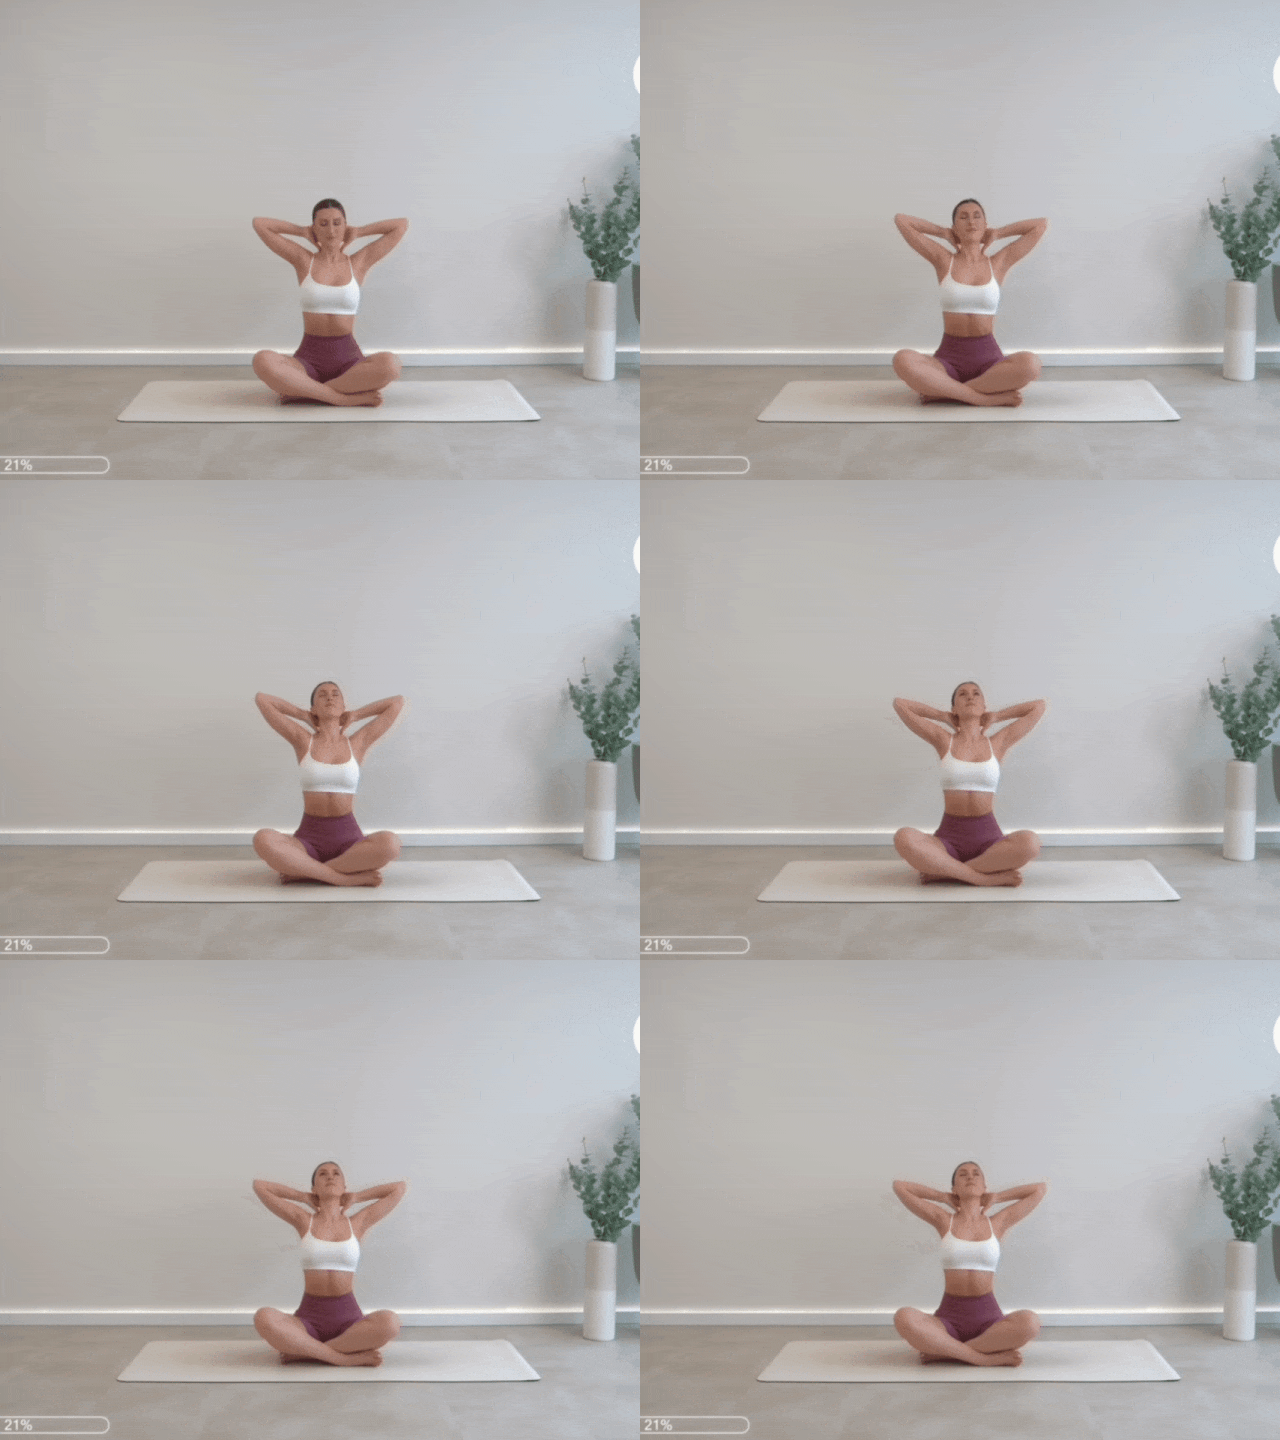
- Sit cross-legged with both hands behind the head.
- Inhale: lengthen the head, neck, and spine.
- Exhale: with control, lower the chin toward the collarbone.
- Let the neck and spine relax. Hold 10–15 seconds.
- Inhale to return. Exhale and lift the chin back and up. Hold 10–15 seconds.
- Repeat for 3–5 rounds.
Key point. Keep the abdomen gently engaged so the torso stays stable, and avoid collapsing the lower back. Support the back of the neck with your hands and move slowly. If you already have a diagnosed cervical condition, go slower still.
4. Seated Spinal Twist
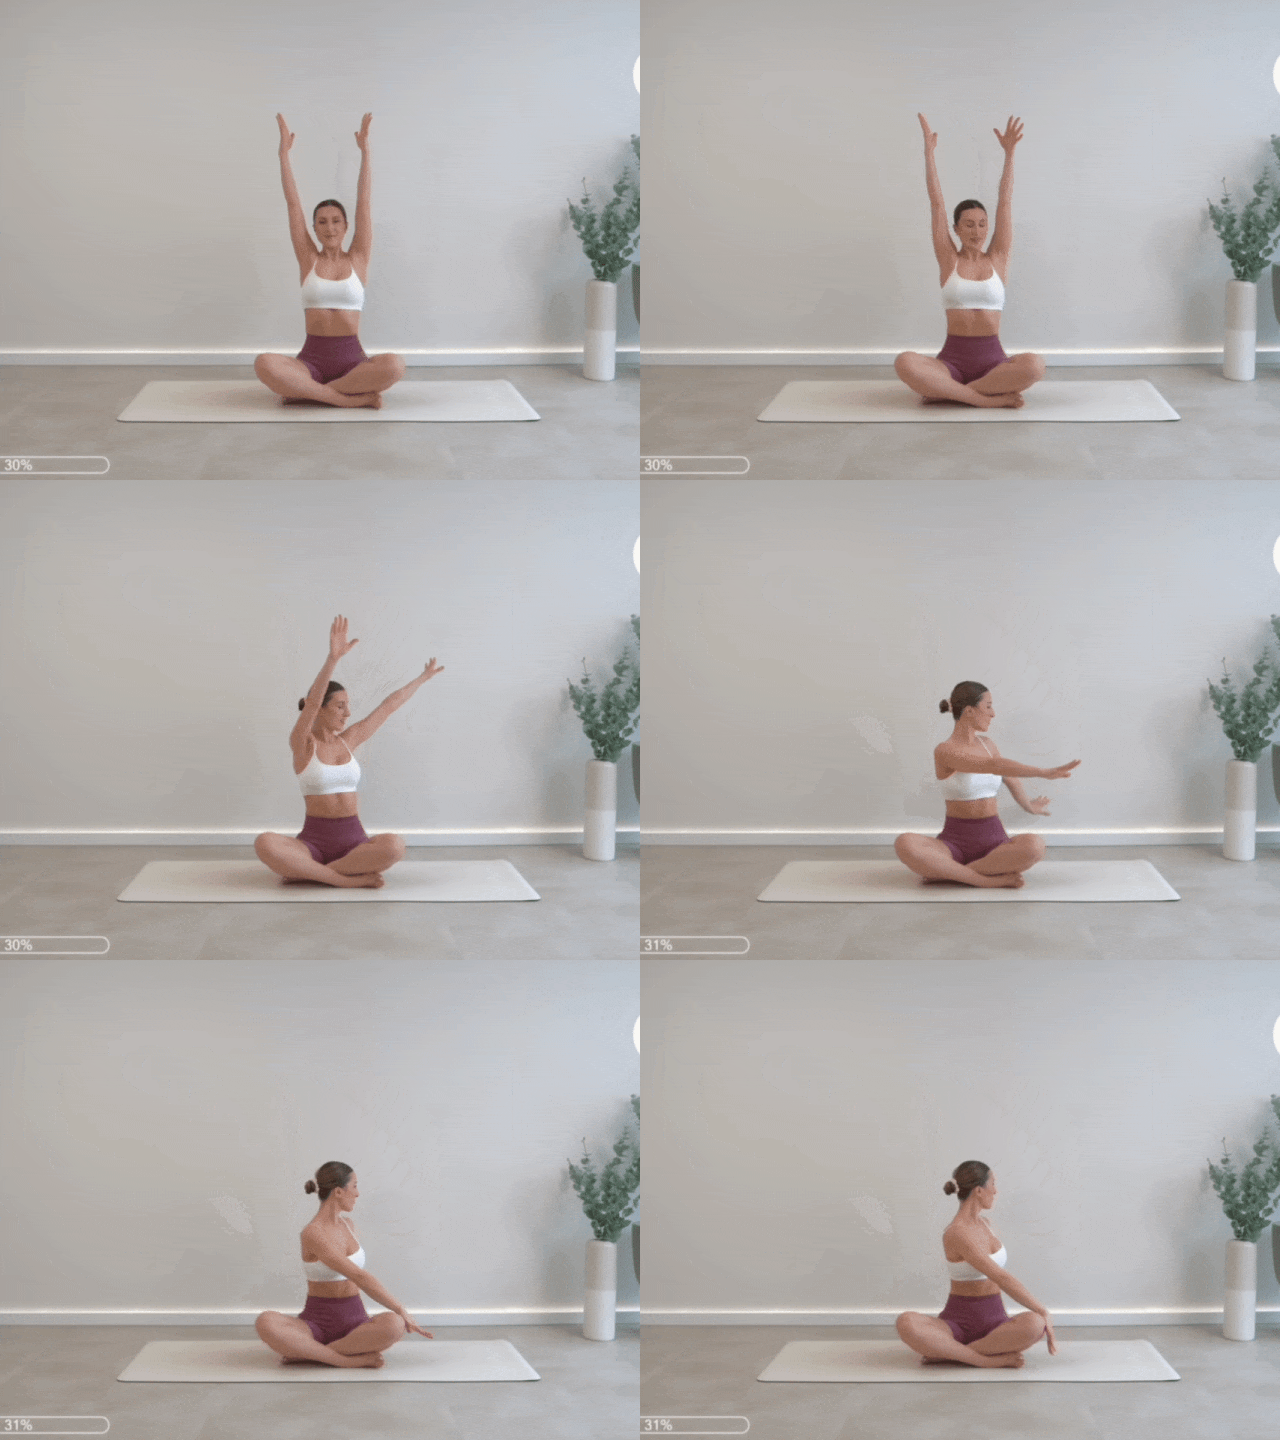
- Sit tall. Inhale and reach both arms overhead.
- Lengthen the head, neck, and spine; keep the back upright.
- Exhale: twist the torso to the left.
- Place the left hand behind you and the right hand on the outside of the left thigh.
- Hold for 30 seconds to 1 minute, then switch sides.
Key point. Establish a long, neutral spine before rotating. Twisting from a slumped position does little; twisting from length is what produces the benefit.
5. Eagle Arms
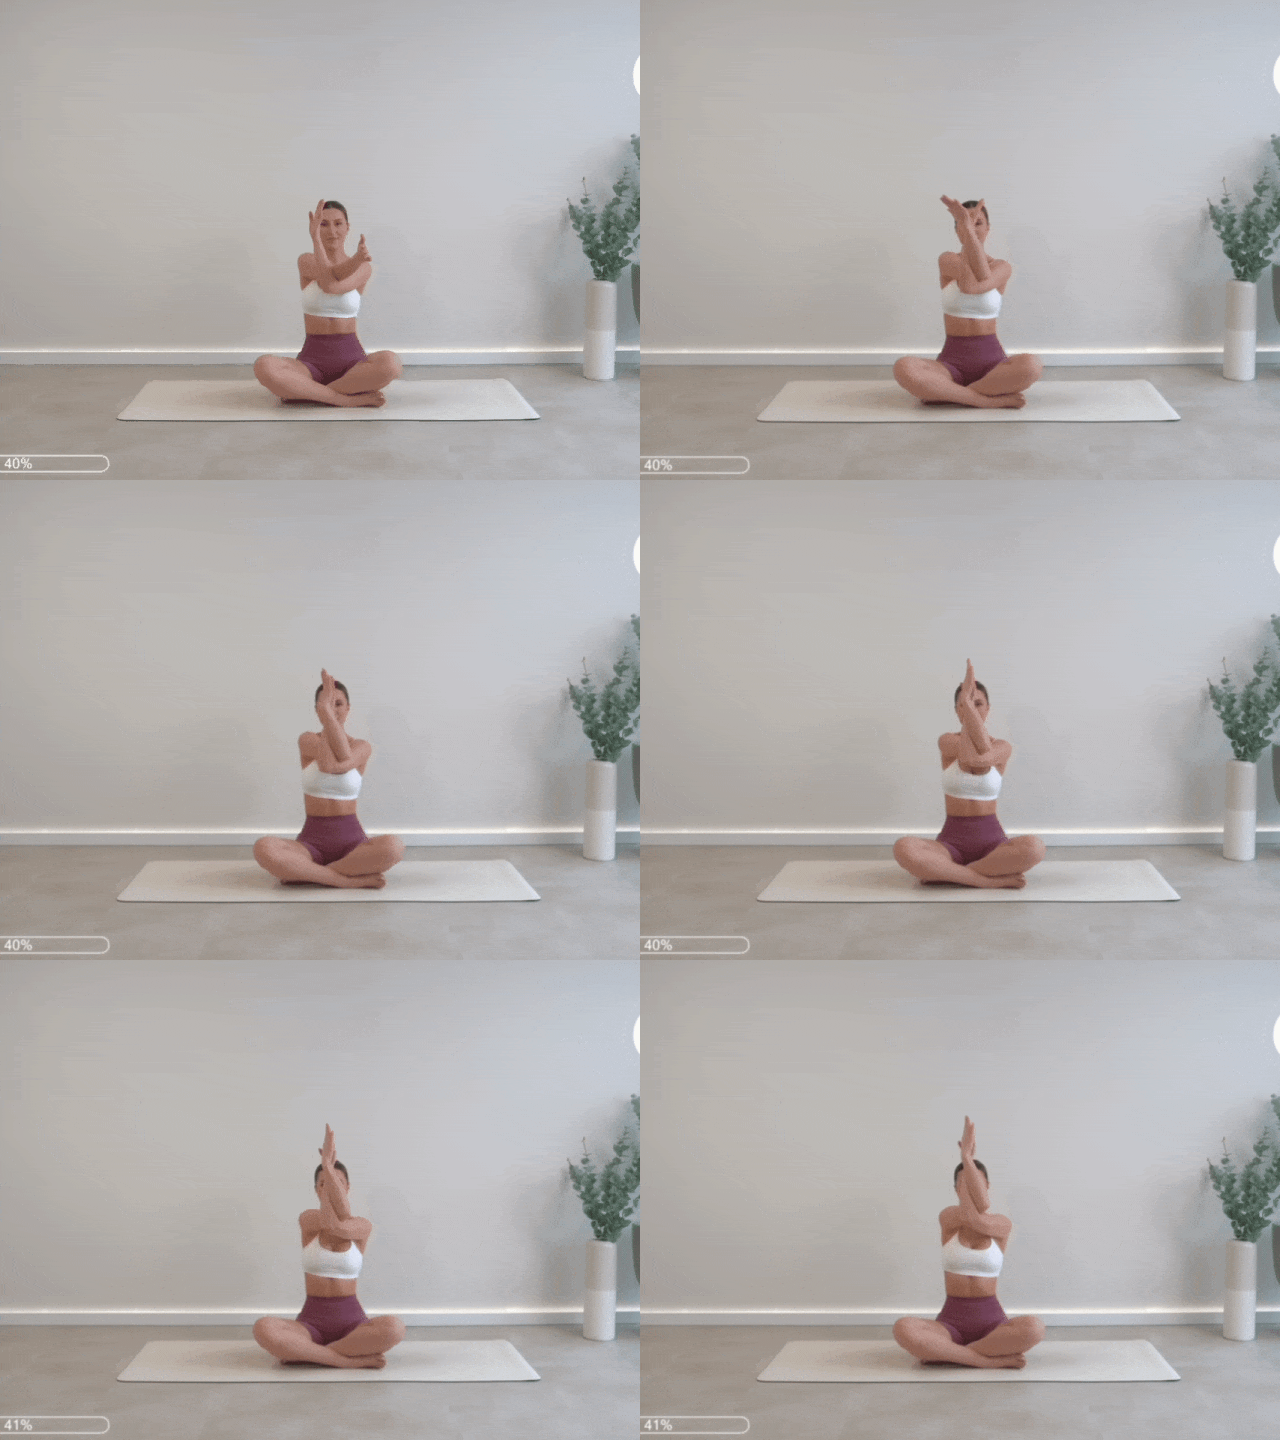
- Sit tall. Inhale and lengthen the spine.
- Exhale: cross the right arm over the left in front of you.
- Wrap the forearms and bring the palms together.
- Exhale again and lift the arms until they are parallel to the floor.
- Hold for 30 seconds to 1 minute, then switch sides.
Key point. Keep the neck, lower back, and torso upright. If the arms will not fully wrap, stop wherever you are — the stretch still works. The palms do not need to meet flat; simply bringing them close is enough.
6. Extended Child's Pose
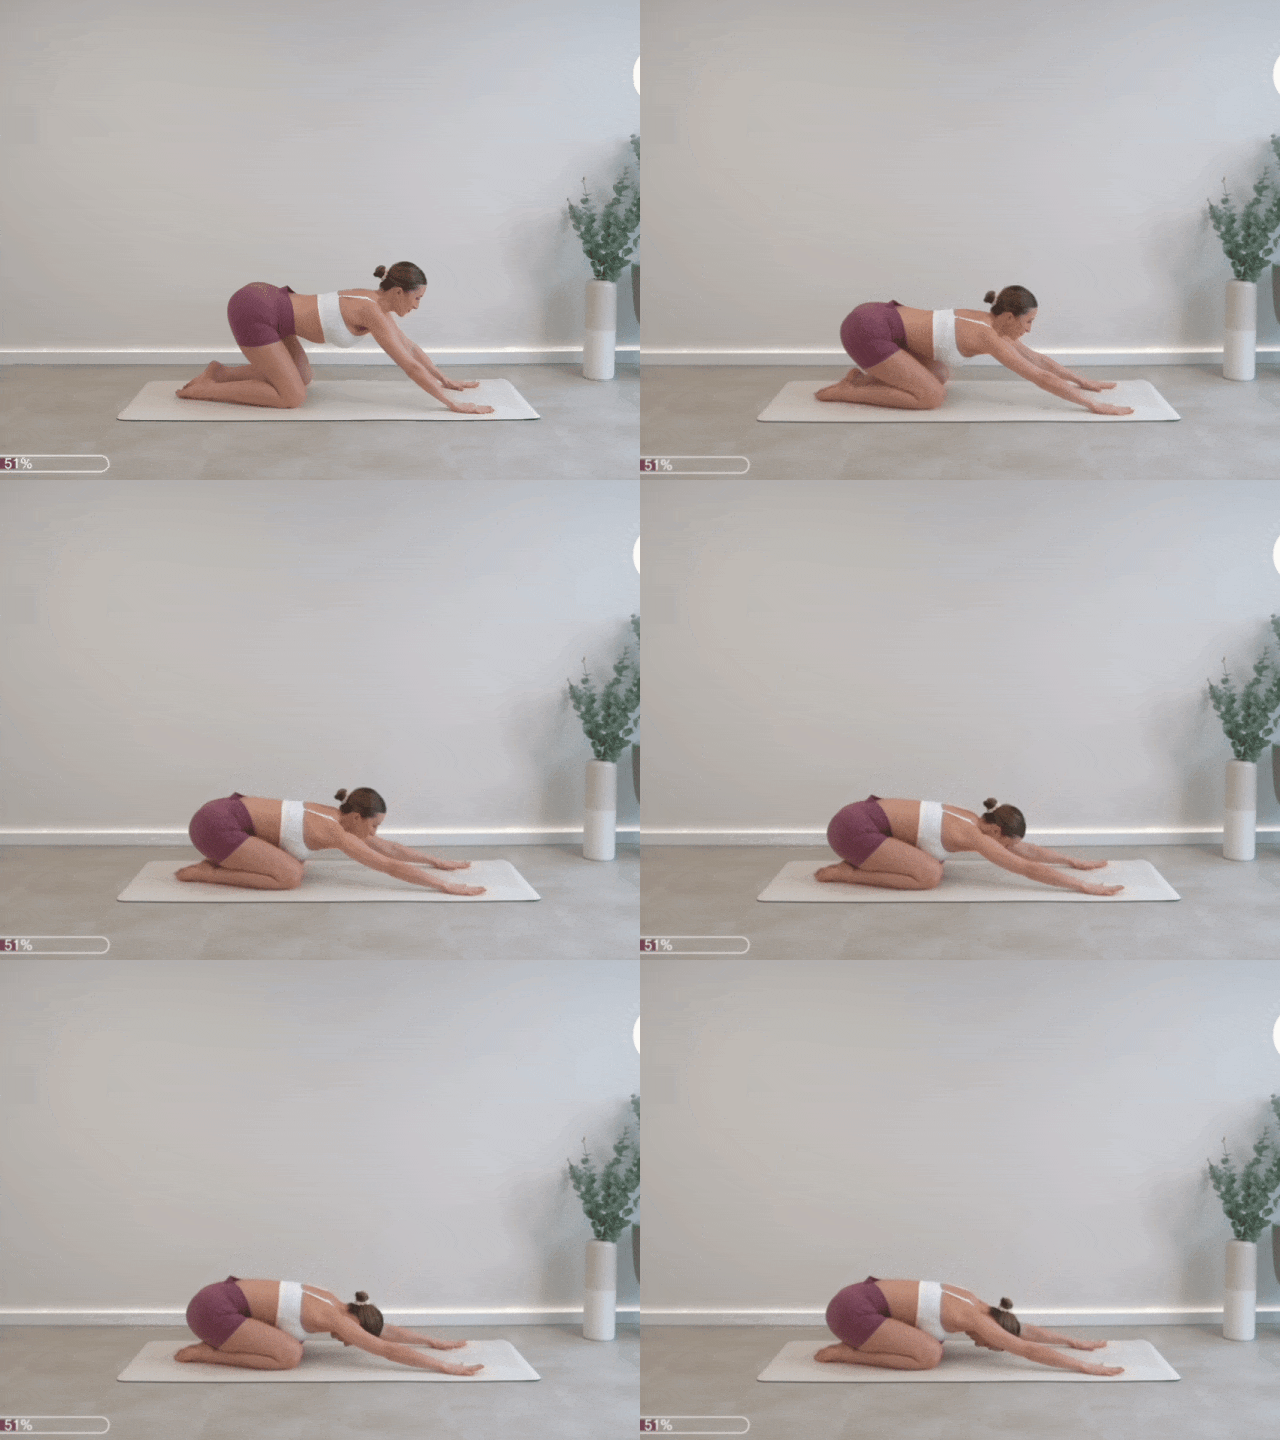
- Kneel on the mat with the knees slightly wider than hip width.
- Sit the hips back toward the heels and extend both arms forward.
- Hold for 30 seconds to 1 minute.
Key point. Let the spine, back, and arms extend fully, resting the forehead on the mat. If the hips will not reach the heels, keep drawing them back so the hips and arms pull gently away from each other — that traction is where the benefit comes from.
7. Thread the Needle
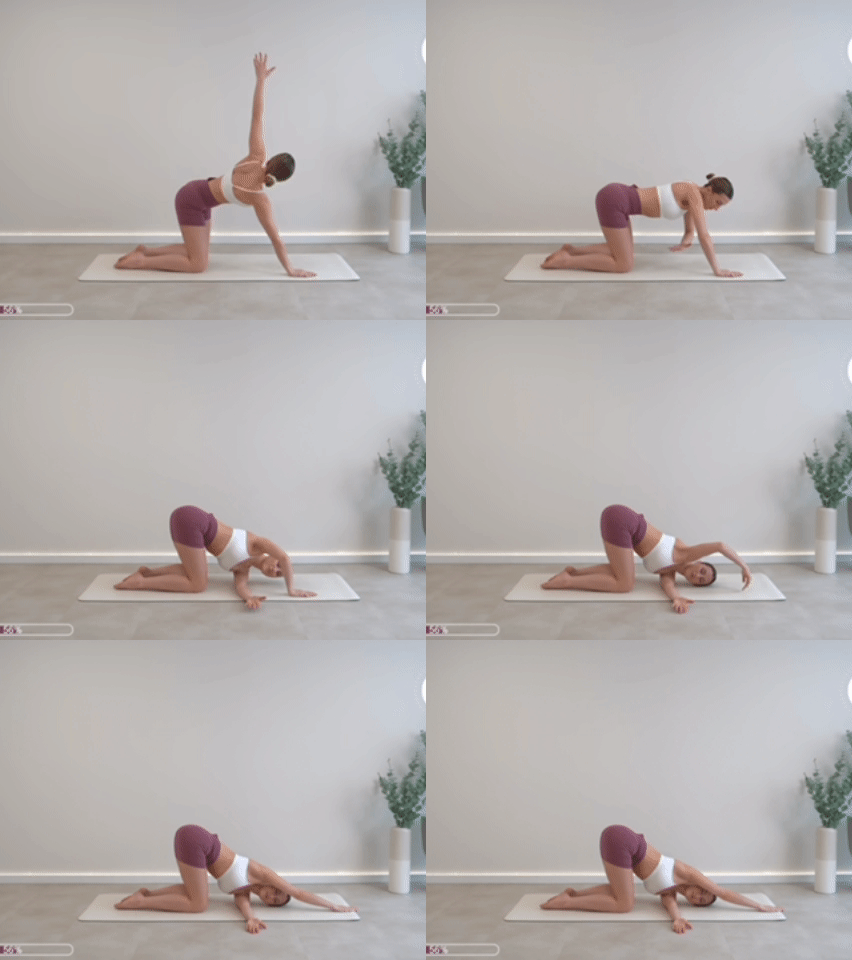
- Come to all fours on the mat.
- Position the knees and hands hip-width apart.
- Keep the thighs and arms vertical, with the shins and tops of the feet pressing into the mat.
- Inhale: open the left arm out to the right side of the body, then reach it overhead.
- Exhale: thread the left arm through in front of the body.
- Rest the left shoulder on the mat and rotate the spine to the right.
- Extend the right arm forward. Hold for 30 seconds to 1 minute.
- Switch sides.
Key point. Keep the thighs vertical throughout — the hips should not drift back or forward. Maintain a neutral body position so the rotation comes from the thoracic spine.
Making It Stick
None of these movements require equipment, and the whole sequence fits comfortably into 10–15 minutes. Three principles will get you the most from them:
- Lengthen first, then move. Almost every key point above repeats this. A stretch applied to a compressed spine achieves very little.
- Slow beats deep. Particularly for the chin tuck and lift, control matters more than range. If you have existing cervical symptoms, reduce the range and slow the tempo further.
- Consistency beats intensity. A short daily session does far more for the cervical spine than an occasional long one.
If you experience persistent numbness in the arms or hands, recurring dizziness, or pain that worsens rather than eases with gentle movement, stop and seek a medical assessment before continuing.